GitHub is an essential platform for developers, enabling them to host, manage, and collaborate on code repositories. If you’ve been working on a project locally and want to upload it to GitHub, this guide will walk you through the process step by step.
Step-by-Step to Push a Local Repository to GitHub
Step 1: Create a GitHub Account (If You Haven’t Already)
Before you can upload a repository, you’ll need a GitHub account. If you don’t already have one, visit GitHub and sign up. The process is straightforward, and once completed, you’ll have access to all of GitHub’s features.
Step 2: Install Git on Your Local Machine
To interact with GitHub from your local machine, you need to have Git installed. You can download Git from the official website here. Follow the installation instructions for your operating system (Windows, macOS, Linux).
Step 3: Initialize a Local Git Repository
Navigate to the project directory you want to upload. Open your terminal (or command prompt on Windows) and enter the following commands:
cd path/to/your/project
git init
The git init command initializes a new Git repository in your project folder. This command creates a .git subdirectory, which contains all the necessary metadata and version control information.

Step 4: Stage and Commit Your Files
Before you can upload your project to GitHub, you need to stage and commit your files:
git add .
git commit -m "Initial commit"
git add .stages all the files in your project directory.git commit -m "Initial commit"commits the files with a message describing the changes. In this case, it’s the initial commit.

Step 5: Create a New Repository on GitHub
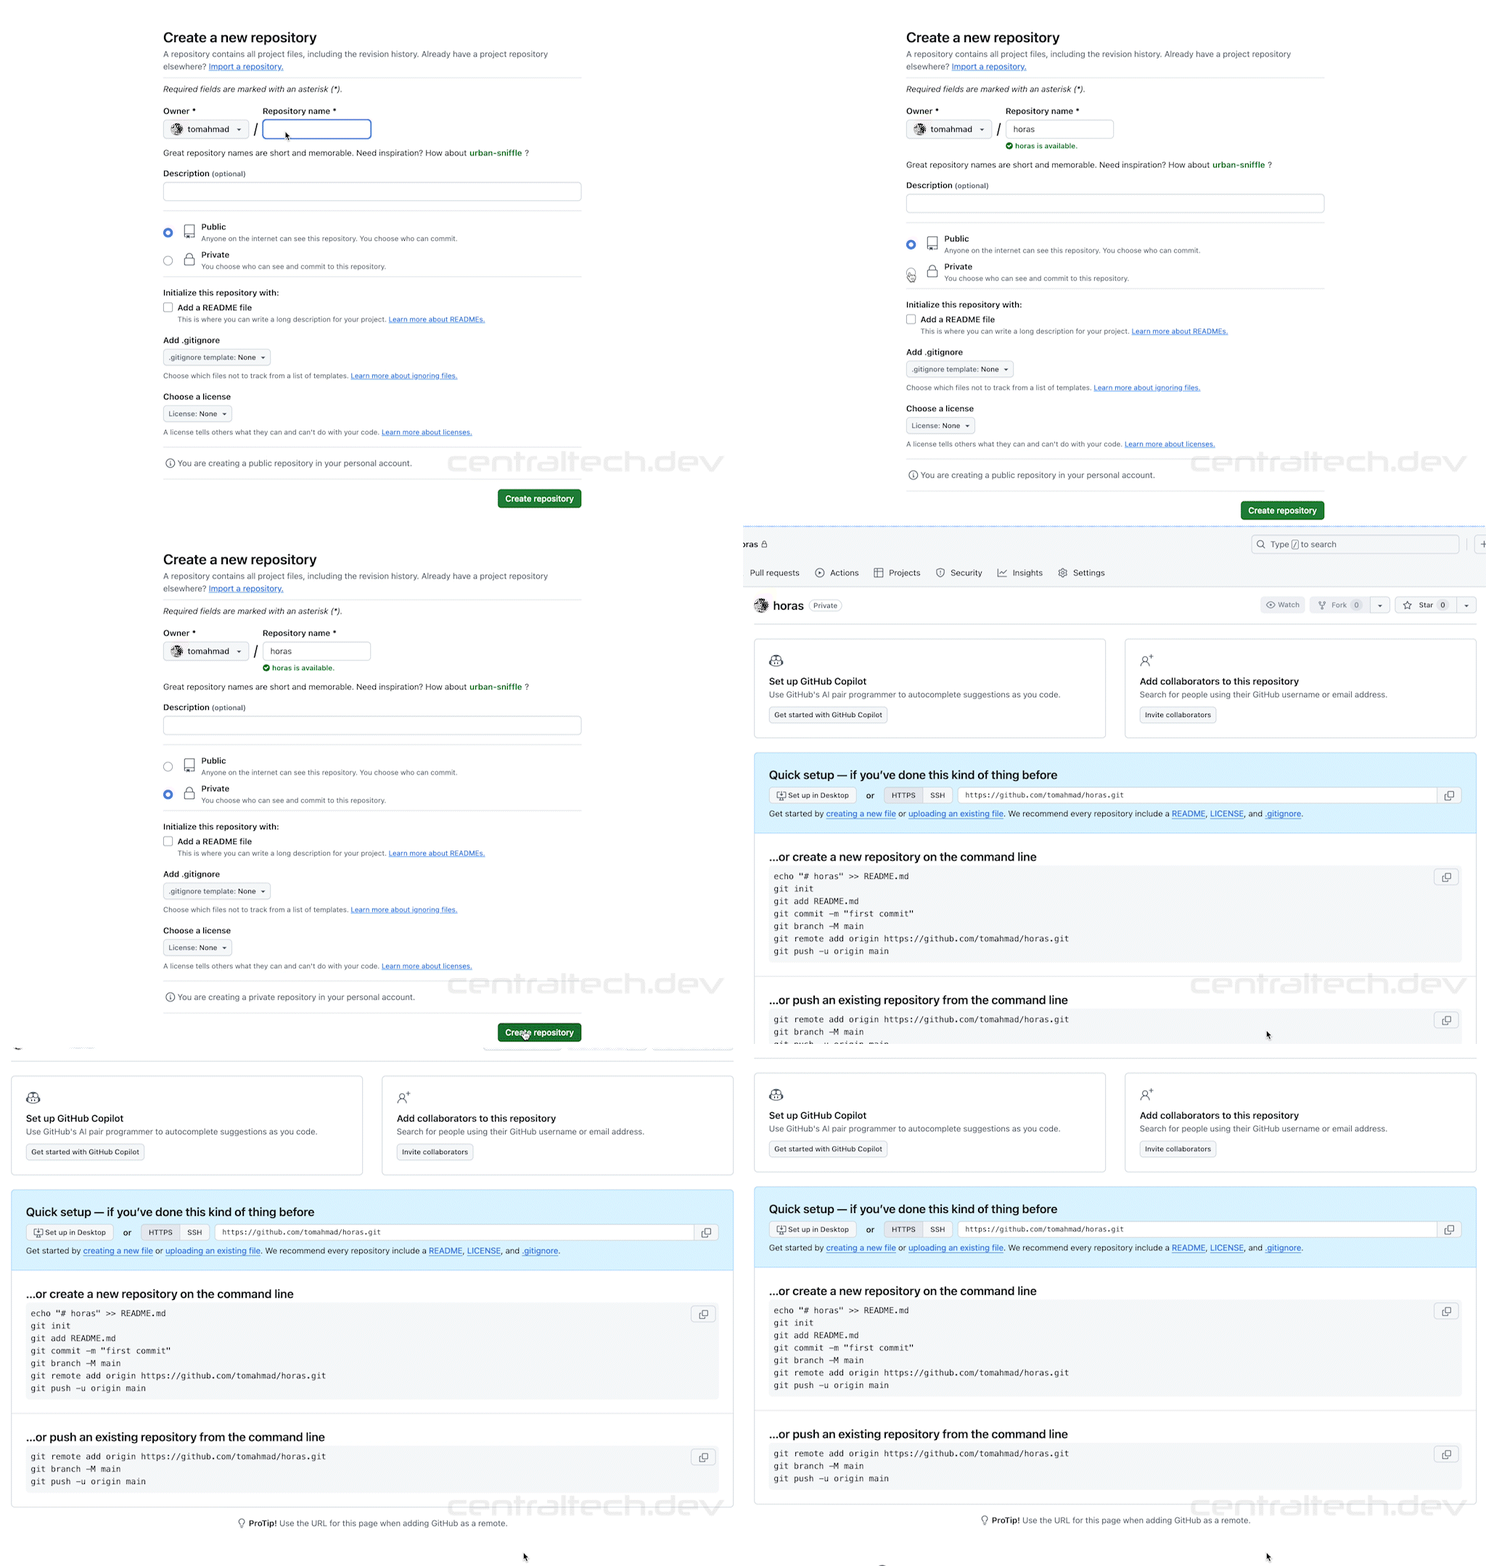
Log in to your GitHub account and navigate to the repositories page. Click the “New” button to create a new repository.

You’ll need to provide some details for your new repository:
- Repository name: Enter a name for your repository (e.g.,
horas). - Description: (Optional) Add a short description of your project.
- Visibility: Choose whether you want your repository to be public or private.
Once you’ve filled out the details, click “Create repository.”

Step 6: Link Your Local Repository to GitHub
After creating your repository on GitHub, you’ll see a page with instructions to link your local repository to GitHub. Follow these steps:
Choose the Correct URL:
- If you selected Public for your repository, choose the HTTPS option.
- If you selected Private, choose the SSH option.
- Next, copy the URL provided by GitHub.

Add the remote repository URL to your local repository:
Back to your ‘Terminal’, then paste the URL here :
git remote add origin git@github.com:tomahmad/horas.git
git branch -M main
Push your local repository to GitHub:
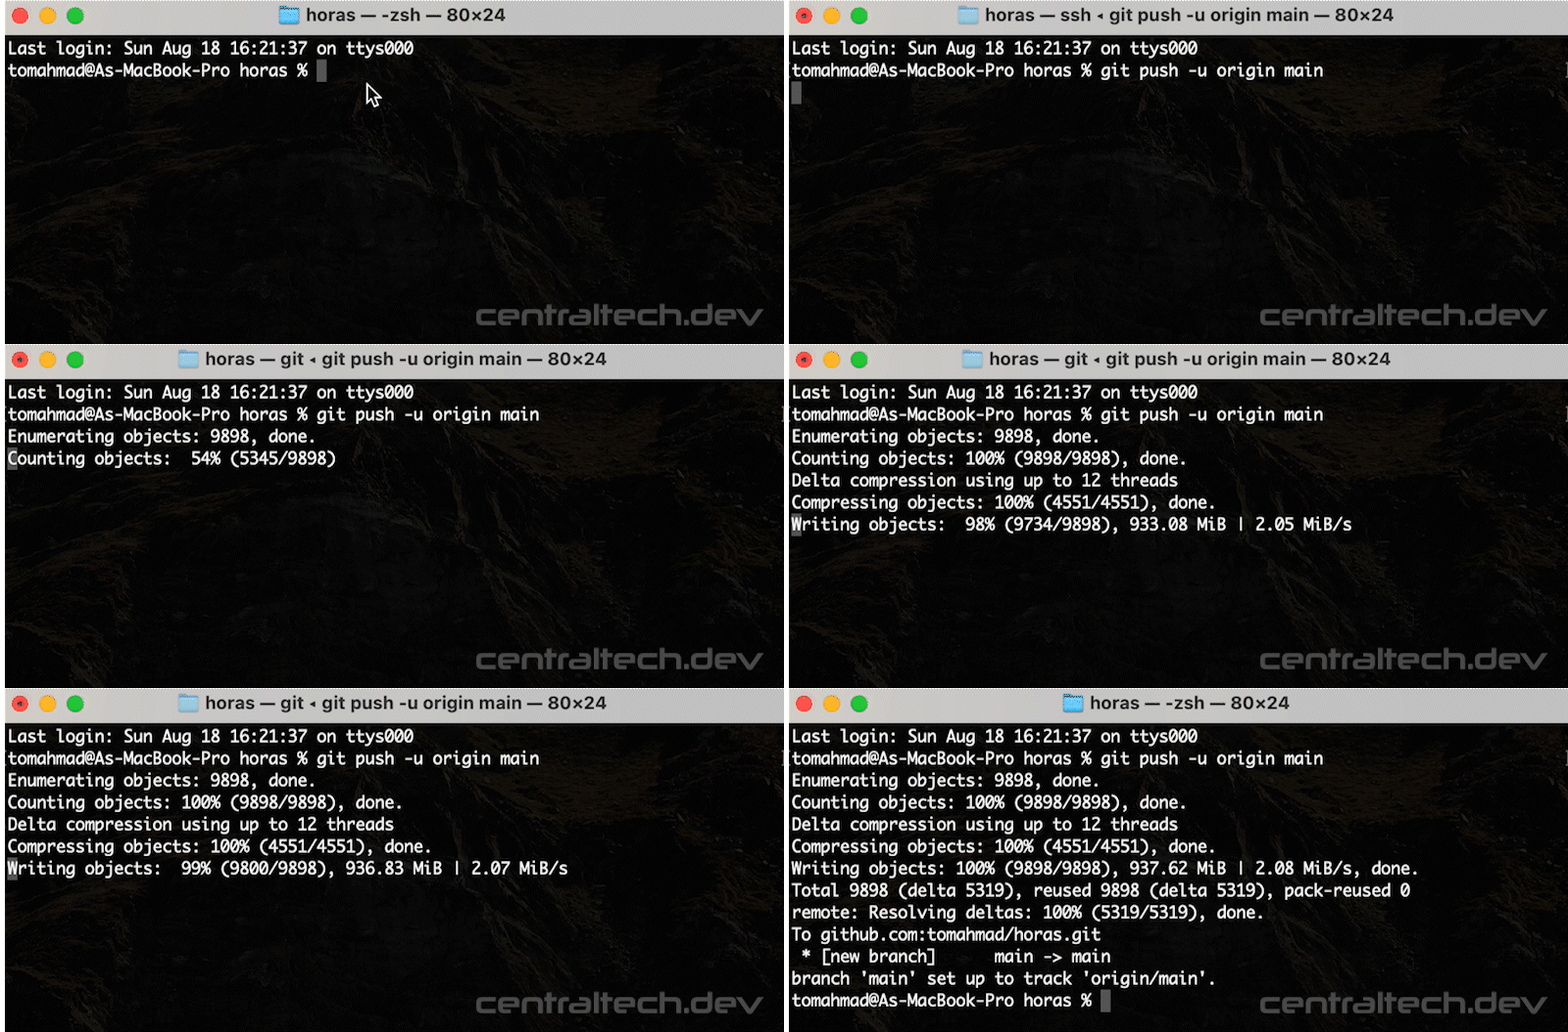
git push -u origin mainThis command uploads your local repository to GitHub, linking it to the remote repository you just created.

Note: If you encounter an error message saying permission denied (publickey) when attempting to push to GitHub, this indicates that GitHub could not authenticate your connection using SSH keys. This issue typically arises when your SSH key is not properly configured or added to your GitHub account. To resolve this, follow the steps in this article to set up your SSH key and connect securely to GitHub or Using a Single SSH Key for Multiple GitHub Repositories.
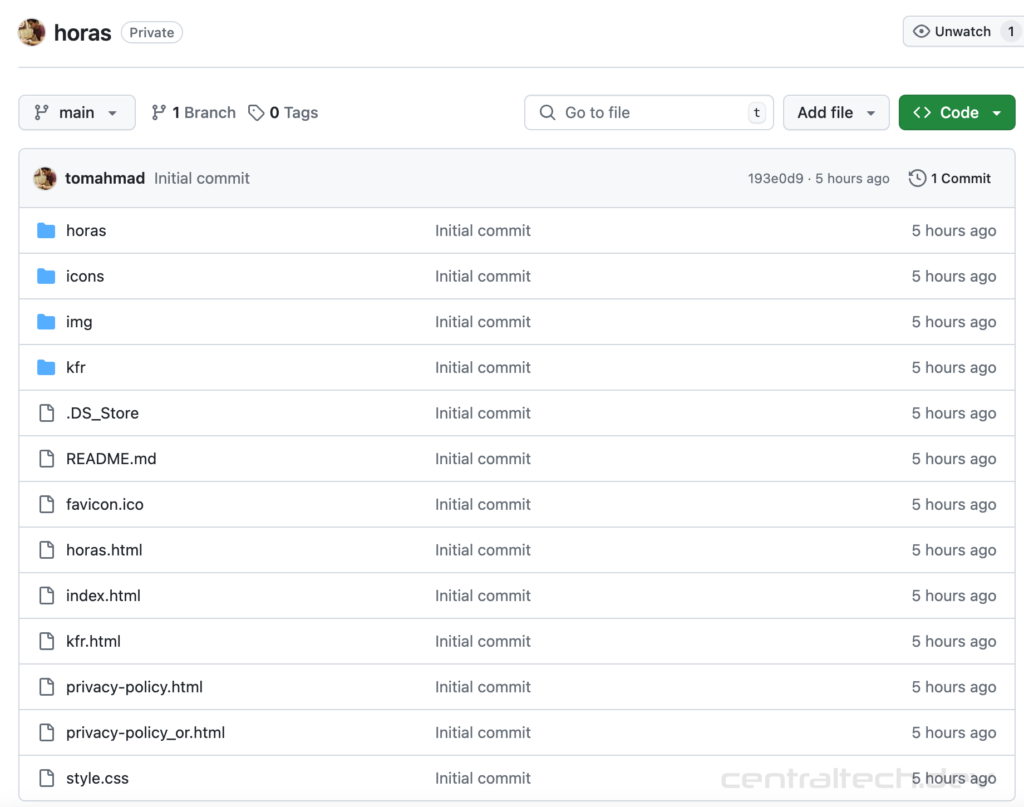
Step 7: Verify the Upload on GitHub
Visit your GitHub repository page to verify that your files have been successfully uploaded. You should see all the files from your local repository listed on GitHub.

Additional Tips
- Branching: If you’re working on different features or versions of your project, consider creating branches. This helps in managing and merging changes effectively.
- Collaborators: If you want to work with others, you can add collaborators to your repository. This allows others to contribute to your project.
Conclusion
Uploading a local repository to GitHub is a fundamental skill for developers, enabling better collaboration and version control. By following this guide, you can easily push your local projects to GitHub and start leveraging the power of distributed version control.
Make sure to follow best practices in naming your commits and managing branches to keep your project organized. Happy coding!

Leave a Reply