
Creating a subdomain can be a useful way to organize your website’s content. For example, you might want to separate your blog from your main website, as in https://blog.centraltech.dev, where “blog” is the subdomain. Here’s a step-by-step guide on how to create a subdomain using cPanel.
Step-by-Step to Create a SubDomain in CPanel
Step 1: Log in to cPanel
First, log in to your cPanel account. You can usually access cPanel by going to https://yourdomain.com/cpanel and entering your username and password or you can access cPanel from member area.
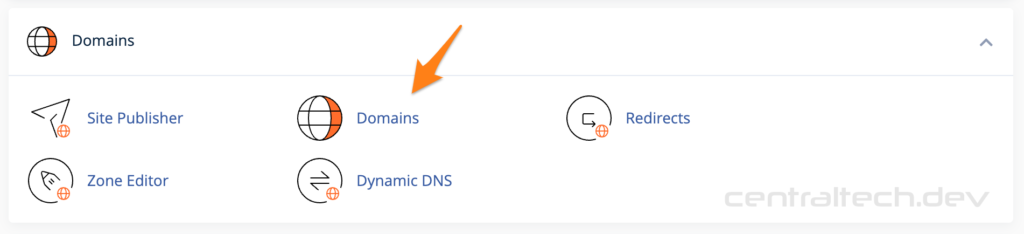
Step 2: Locate the Subdomains Section
Once logged in, scroll down to the “Domains” section and click on the “Domains” icon.
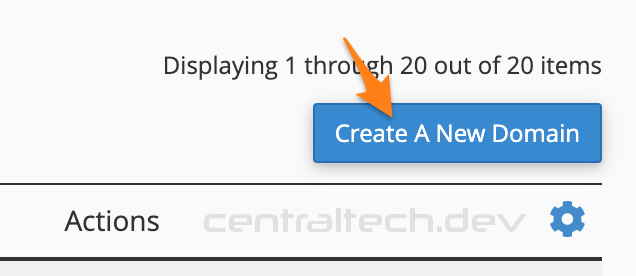
Step 3: Create the Subdomain
Then, click “Create A New Domain“.
Step 3: Create the Subdomain
In the Subdomains section, you will see a form with several fields:
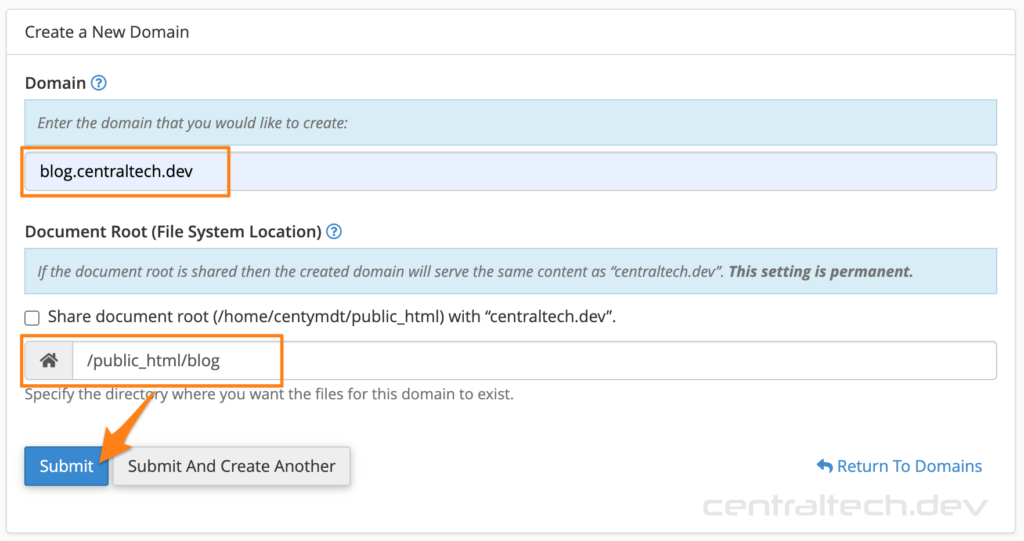
- Domain: Enter the name of your subdomain. For example,
blog.centraldev.com. - Document Root: Enter the name of your subdomain again, for instance,
/public_html/blog.
After filling in these fields, click the “Submit” button.
Step 4: Verify the Subdomain Creation
If successful, you will see a notification saying, “Success: You have successfully created the new subdomain.”

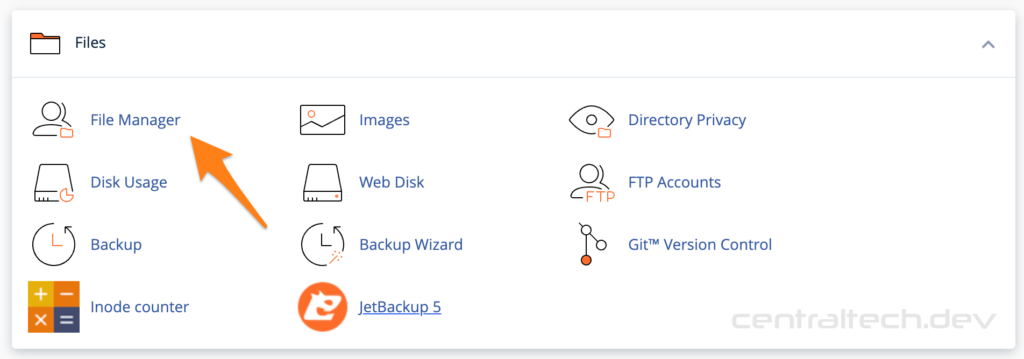
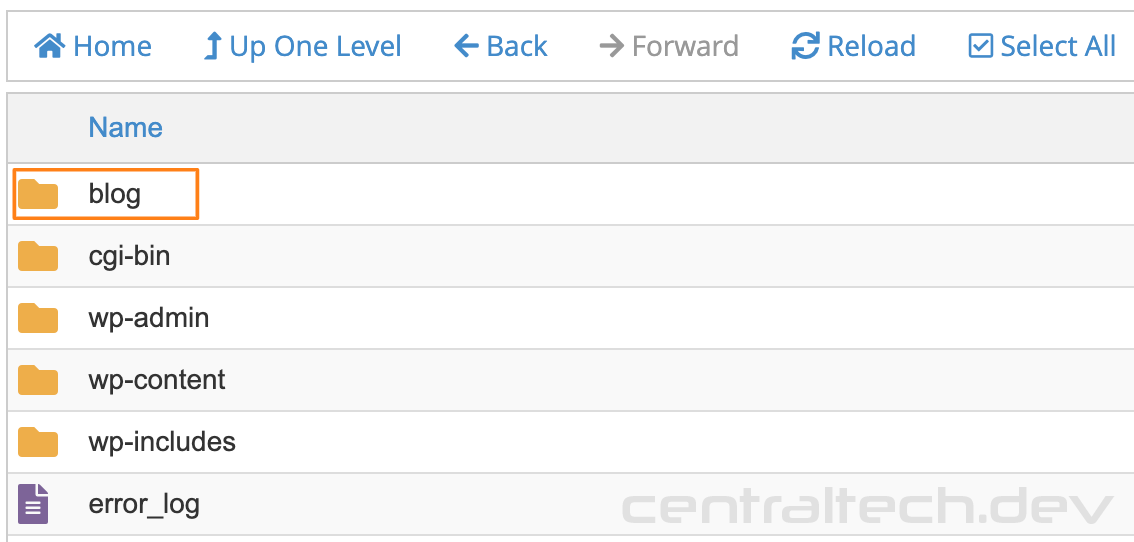
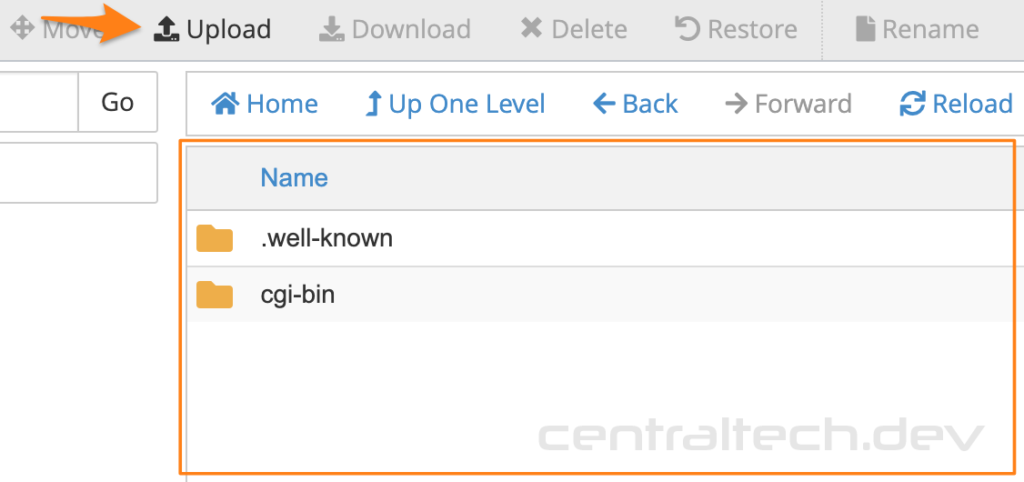
Step 5: Upload Content to Your Subdomain
To upload content to your new subdomain, you will need to use the File Manager or an FTP client. Navigate to the document root directory specified earlier (e.g., public_html/blog) and upload your website files there.
Step 6: Access Your Subdomain
After uploading your files, you can access your new subdomain by going to https://blog.centraltech.dev in your web browser. Your website should display the content you uploaded to the subdomain’s directory.
Additional Tips
- DNS Propagation: It may take some time for DNS changes to propagate, so if your subdomain doesn’t work immediately, give it a few hours and try again.
- SSL Certificate: If your main domain has an SSL certificate, you might need to add one for your subdomain as well. You can do this through cPanel by going to the SSL/TLS section and adding a certificate for your subdomain.
- Subdomain Management: You can manage and modify your subdomains anytime by returning to the Subdomains section in cPanel.
Creating a subdomain in cPanel is a straightforward process that can help you organize your website’s content more effectively. Whether you’re setting up a blog, a shop, or a forum, subdomains can be a valuable tool in your web development toolkit.
Leave a Reply